This example shows how to use maps created in the Tiled map editor with the OpenSNES map engine. A 224x30 tile level (1792x240 pixels) scrolls horizontally with the D-pad. Only the visible 32-tile window is in VRAM at any time — the map engine streams new columns as the camera moves.
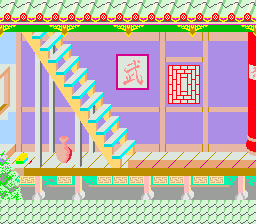
Screenshot
What You'll Learn
- How to design levels in Tiled and convert them for the SNES
- How the map engine streams a large level through a small VRAM window
- How tile properties (collision, palette, priority) flow from Tiled to the game
- The complete asset pipeline: Tiled → opensnes-level → ROM
The Tiled Workflow
Tiled Editor opensnes-tileset opensnes-level
┌──────────────┐ ┌──────────────┐ ┌──────────────┐
│ Paint tiles │ │ tileset.png │ │ level.tmj │
│ Set props │ │ ↓ │ │ + tileset.map│
│ Export .tmj │ │ .pic .pal .map│ │ ↓ │
└──────┬───────┘ └──────────────┘ │ .m16 .t16 .b16│
│ └──────────────┘
└── Your level data, ready for mapLoad()
Step 1. Design your level in Tiled (8x8 pixel tiles, any width/height up to 16384 tiles total). Set per-tile properties: attribute (collision), palette (0-7), priority (0-1).
Step 2. Export as .tmj (JSON format).
Step 3. Convert the tileset image with opensnes-tileset. The settings live beside the picture in res/tileslevel1.png.toml, and the build runs the conversion before compiling:
tool = "opensnes-tileset"
[convert]
colors = 48
# Outputs: .pic (tiles), .pal (palette), .map (tile optimization table), .inc (the C declarations)
Step 4. Convert the Tiled map with opensnes-level. Its settings file names the tileset's .map, and the build converts the level after the tileset:
# res/maplevel01.tmj.toml
tool = "opensnes-level"
[convert]
tileset = "tileslevel1.map"
# Outputs: BG1.m16 (tilemap), maplevel01.t16 (tile defs), maplevel01.b16 (attributes),
# maplevel01.o16 (entities), maplevel01.inc (the C declarations)
Step 5. The build links the converted graphics (res/tileslevel1.inc declares them, res/maplevel01.inc the level's); call mapLoad() in your game — no data.asm.
SNES Concepts
Map Engine Streaming
The SNES has limited VRAM — a 32x32 tilemap is only 2KB. A 224-tile-wide level won't fit. The map engine solves this by keeping the full level in ROM and streaming only the visible 32-tile window to VRAM:
- mapLoad() — copies the full map to extended WRAM (bank $7E), builds lookup tables
- mapUpdate() — detects when the camera crosses a tile boundary, prepares column updates
- mapUpdateCamera() — sets the camera position (in map pixels)
- mapVblank() — DMAs the column updates to VRAM during VBlank
The tilemap lives at VRAM $6800 with SC_64x32 layout — this is required by the map engine.
Tile Properties
Each tile in the Tiled editor can have custom properties:
| Property | Tiled Field | SNES Effect |
| attribute | Hex string (e.g., "FF00") | Collision type: T_SOLID, T_LADDER, T_SPIKE, etc. |
| palette | Hex string (e.g., "1") | Palette bank (bits 10-12 of tilemap entry) |
| priority | Hex string (e.g., "1") | BG priority bit (bit 13 of tilemap entry) |
These are stored in .b16 (attributes) and .t16 (palette+priority) files by opensnes-level.
Controls
| Button | Action |
| LEFT | Scroll camera left |
| RIGHT | Scroll camera right |
Project Structure
tiled/
├── main.c — Initialize map engine, scroll with D-pad
├── res/tileslevel1.png.toml — import settings of the tileset (opensnes-tileset)
├── res/maplevel01.tmj.toml — import settings of the level (opensnes-level, the tileset's .map)
├── Makefile — no conversion rule: the two settings files drive the build
└── res/
├── tileslevel1.png — Tileset sprite sheet (source)
├── maplevel01.tmj — Tiled map (JSON, source)
├── tileslevel1.pic — Generated: 4bpp tile graphics
├── tileslevel1.pal — Generated: palette (3 banks × 16 colors)
├── tileslevel1.map — Generated: tile optimization table
├── BG1.m16 — Generated: full level tilemap
├── maplevel01.t16 — Generated: tile palette+priority
└── maplevel01.b16 — Generated: tile collision attributes
Modules Used
| Module | Why it's here |
| console | consoleInit(), WaitForVBlank(), NMI handler setup |
| sprite | OAM buffer (required by NMI handler) |
| dma | DMA transfers for tiles, palette, and map column streaming |
| input | padHeld() for continuous D-pad reading |
| background | BG layer configuration and scroll registers |
| map | mapLoad(), mapUpdate(), mapVblank() — the streaming map engine |
Build & Run
cd $OPENSNES_HOME
make -C examples/maps/tiled
Open tiled.sfc in Mesen2 and scroll with LEFT/RIGHT.
Making Your Own Level
- Install Tiled (free, cross-platform)
- Create a new map: 8x8 pixel tiles, any width up to ~200 tiles
- Import your tileset PNG and paint your level
- Add tile properties (attribute, palette, priority) in the tileset editor
- Export as .tmj
- Update the Makefile with your filenames
- make clean && make
The map engine handles the rest — streaming, scrolling, collision lookups via mapGetMetaTilesProp().

 1.16.1